In our last article on brisket we focused on buying and prepping your cut of meat. This article is about the delicious conclusion: cooking and cutting the finished product.
One thing you’ll want to keep in mind is that whenever you do cook this brisket, it’s going to take up a significant portion of your day. It doesn’t mean you’re going to need to sit on the edge of your seat and fuss over it. It just means you’re going to need to be around to regularly check on the progress of the cook.
Cook
The ideal, if your space and budget allow for it, is a wood smoker, like the type made by Meadow Creek. Then you get into the nuances of wood selection and choosing among hickory, pecan, oak, and mesquite.
If, for whatever reason, a wood smoker isn’t currently in the cards, you might consider a Weber Smoky Mountain or a Big Green Egg, both of which run on charcoal. The Camp Chef Woodwind is also growing in popularity. It’s easy to set up and use and utilizes real wood pellets and produces excellent smoke rings. Do keep in mind that whatever size you choose is going to affect the size brisket you can cook. For example, a full packer will barely fit into some kettle grills, which leads some people to remove the flat and cook only the point.
Once you’ve got your brisket in your smoker (we are not going to get into the fat cap up vs down debate), you’ll want to keep a balance between watchfulness and opening the smoker too often. Every 30-60 minutes earlier in the cook you will want to spritz the brisket with apple juice or apple cider vinegar or hot sauce (again, what makes the most sense for you). You’ll want to do it at enough of a distance so as not to shoot off portions off your developing bark, that crispy exterior of your brisket.
You’ll also want to keep monitoring the internal temperature of the meat and make sure that it’s on an upward trajectory towards 200°F. You don’t want wild temperature swings during the cook.
At around 165-170°F you will often run into “the stall,” which means that the meat’s internal temperature will stop rising for a few hours if left to its own devices. Many people choose to “assist” through this period by wrapping the brisket in butcher paper or foil. Keep in mind that foil is going to lead to more of a steamed look (and taste). Again, there is no “right” way here — just the way that makes the most sense to you.
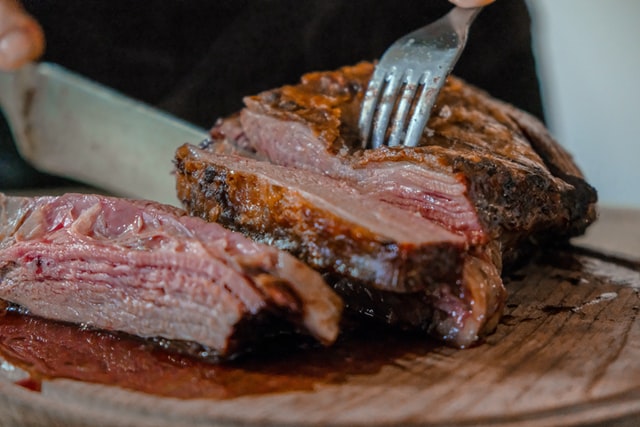
Cut
When you are finally done cooking (a basic rule of thumb is if the meat offers no resistance to sharp objects) you can ruin all your work by cutting the brisket right away. You will want to rest your brisket for at least two hours after you take it out, but some choose to wrap it in butcher paper and “finish” it in an insulated cooler for those two hours, which often adds a great deal of texture and tenderness to the brisket.
You want to cut brisket across the grain and an easy way to give yourself a guide after the cook is, to cut a small piece (during prep) from the corner of the brisket that is perpendicular to the grain on the flat side. That’ll help you know the direction when everything is cooked through.
You’ve worked hard: time to enjoy. And remember, cooking brisket is part art, part science, and you’ll get better as long as you stay patient with yourself and keep tweaking and learning through the process. It’s one of the most rewarding culinary things you can do as a Gent.
Just as in our last article, are there any tips you would add for your fellow Gents? Let us know in the comments below.